Forms: A tutorial on one of TouchDown’s coolest features

Today’s tutorial is packed full of information, so grab a cup of coffee and settle in!  The Forms Feature in TouchDown is not the most used feature in TouchDown, but it has amazing functionality for those who need forms on the go.  Forms are a great way to communicate similar information across various occurrences: Imagine you are  an IT Tech headed to an onsite visit and need to communicate status, photos and conclusions to your boss in an email, or  that you are a  team member and have a daily meeting for which results need to be shared with your team via email.  Fire up Forms in TouchDown, create your  items to create in the forms (say, time of event, findings, photo, conclusion, next steps, etc), then send the result to your specified recipients  in a nicely formed email.  Super useful, right?  Here’s Dragonfly, our Tech Support Guru, to tell you how:

Hi,

Dragonfly here, and I’m going to talk about one of the less used, but still very cool features of TouchDown: Forms. The TouchDown form generator allows you to create your own forms that can easily be edited to include various fields, such as Date, text fields, checkboxes, etc, so an end user who imports a form can enter just a few values, and automatically generate an email that incorporates said values. Today, I’m going to demonstrate basic form creation and deployment in this tutorial. You can read more about TD forms here: https://nitrodesk.zendesk.com/entries/37112027-Mobile-Forms-Installation-User-s-Guide

To start, download the forms generator here: tinyurl.com/tdforms.

Another thing you may want to have is Outlook, so you can send the form out easily when it’s been created. But, it’s easy enough just to save it if you don’t haveOutlook.
First, download the file, and once you open it, choose ‘Design new form.’

This is the main Forms interface. The screens are as follows:

Capture

1. General: allows you to save and send the form
2. Screens: allows you to control the content of the screens
3. Generated data: allows you to control the outgoing email
4. Recipients: controls who gets the results of the form
5. XML View: to view the code.


Now, before I start building the form, I will need to plan out what I want to do with it. For this example, I decided to do something a little more whimsical- I’m going to create a character sheet for a generic tabletop Role playing game, but it should demonstrate some of the basic capabilities of forms that can be applied to just about anything.
First, I’m going to create my first screen. It’s going to show the character creation and date. To do this, I click ‘add screen’.
Now, you can see I’m on the name screen. To add functions to it, I drag and drop them into the main area, and then, using the menu on the right, add attributes so they make sense and aren’t just random fields.

Capture5

Note the field on the side that is used to set attributes. This comes in very handy as it allows you to customize what the various fields do and look like.
Now I’m going to edit the field for the name text box. Nothing fancy here, just changing the general label and name from ‘Nameless’ to ’Name’ so the user knows to put the character name in there.
I add a label to the date field as well. Now that I’m done with that, I’m going to create a button that will go to the next page, which will be where I store the player stats. I click on the advanced field and hit the … button

Capture7

Creating buttons to control the navigation of the form is essential, otherwise there will be no way to send, cancel, or go to other screens.

One that shows up, I create a new button. Since it’s going to the Stats page, I set the destination as Stats, and set the Label as ‘Next’.Capture8

Now, I create the stats page.

Capture9

I add several text boxes for various numerical stat values, remembering to add names and labels, but I also add a drop down menu for the player class.

To do this, I drag the dropdown over, and assign it a label, then click on Misc to add a few character classes. Lastly, I click on a blank spot in the area to add a next button, like I did last time, to go to the ‘Inventory’ screen.

Capture10

Adding a drop-down label

Capture11

Drop down options for player classes

Now for the final screen, I’m going to include a checkbox to show that functionality. I add two text boxes for player’s inventory and skills, then ∫to determine if this is the person’s primary character. The checkbox serves to add a true/false after the selection, so it’s useful for Boolean situations.

Capture12

The primary character button. Remember to add a correct ID/Label to every field.

Since I’ve decided that his is enough data to get a sense of what the character is, I create my done button. I click on an empty space in the screen, then pull up the navbutton editor.

Capture13

Note that since this is the last screen, the “IsDone field” can be set to True.

Now that we have a list of fields and screens the user will interact with, I go to the Generated Data screen. I choose ‘Email Subject’ as the editable field, and enter ‘Character Sheet’ then switch to the body, and drag and drop the fields I would like to edit there. Since I don’t want to create a big block of text, I add a little HTML formatting.

Capture15

Note the <p> and <br> to break it up.

Capture17

Adding myself on the recipients tab.

On the recipient tab, I add myself, click save, and then go back to the General tab and Save, then hit Send.

I send it to myself, and it comes in as an attachment. After long pressing on it, I choose ‘Import Form,’ and TouchDown gives me the message that it is importing.


1398379430357


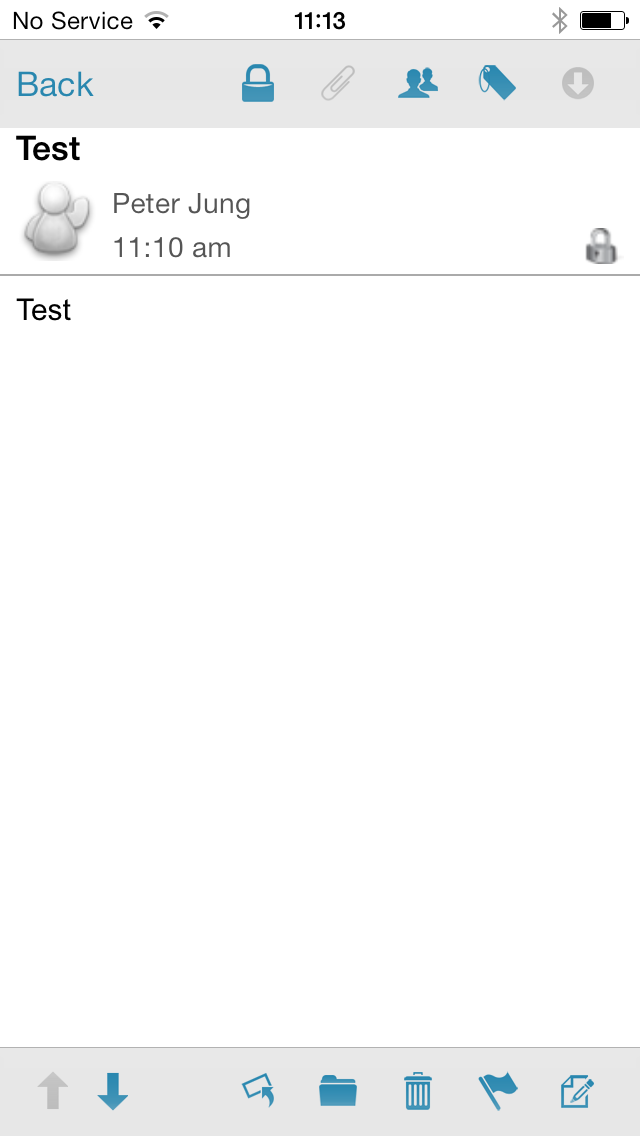
The email from Outlook

1398379439446

In the inbox, I hit menu>select form, and choose the form there.

Then, I go through the screens:

1398379454093

1398379473938

Changing his character class

1398379479890


And this is what the output looks like:

1398379486141

A completed character.

Eventually I plan on showing off more functionality with Forms, but this should help you get a better introductory understanding of how they work and what their abilities are. If you have any questions about forms, please let us know at support@nitrodesk.com.


Securing your Email with S/MIME

Today we start an awesome mini-series from one of our support gurus, DragonFly, about how S/MIME works in general, with following tutorials on how to implement S/MIME in TouchDown on iOS, Android and Mac platforms.  Check out today’s tutorial on iOS!

Hi,

Dragonfly from NitroDesk support here. In the following, today I’ll be describing how to import and use S/MIME in Touchdown for iOS. Using this functionality you can sign messages, proving that you are the person sending that particular message, and optionally encrypt them, meaning the email will only be readable by people who you have included in the message. Signing provides you with non-repudiation and potentially detect tampering on the fly and encryption prevents unauthorized viewing of the message. This type of functionality is great for keeping your emails safe and ensuring that information’s coming from the right source. (For more information on how S/MIME works, here’s a good tutorial: http://technet.microsoft.com/en-us/library/aa995740%28v=exchg.65%29.aspx) Just know that to send an encrypted email, you need to have the recipient’s public key and vice versa- these can be verified from within Touchdown when that person sends you a signed message. Here’s what you’ll need before you get started:

First, you’ll need a certificate for S/MIME signing and the latest version of Touchdown. To get a certificate for S/MIME, you’ll want to contact your IT team. Also, keep in mind the only two certificate types Touchdown supports is .pfx and .p12. The certificate would need to include the complete chain to the root certificate authority.

If you have your certificate already in IE, but need to export it to your desktop,Here’s how (in IE):

1. Go into the Settings>Internet Options, and clicking on the Content tab.

2. Click on Certificates, and find the one you want to export

3. Click Export. Make sure you choose the option to export the private key and also to include all certificates in the certification path.

4. Choose a file path, and save it.

5. Don’t forget to  remember the password you use to perform the export. This password prevents anyone else from being able to access the certificate. If you’re having difficulty with this process, contact your IT team and see if there’s another way you should be doing it. As with any operations like this, make sure you are staying within your IT team’s best practices so you stay in alignment with any security policies.

6. Once you have your certificate backed up to a file, send that file to your email as an attachment, and you’re ready to go.

Let’s start with the iOS version.

S/MIME for iOS

In this demo, I show how to send an encrypted email to the ‘welovenitrodesk’ account.

First, I want to ensure that I have my certificate for S/MIME, so I find the email with the attached certificate, and view it in the attachment list.

IMG_0007
The attached certificate, note the file type is .pfx. 

After downloading, I click the ‘I’ icon and choose to ‘Import for both.’

IMG_0008
Choose Import for Both.

A password prompt appears.

IMG_0009
Enter your certificate password here that was created when you generated the certificate. 

After entering the correct password (This is set up during certificate exporting from your browser, for help with this  please contact your IT team) it will tell you your certificate has been saved.

IMG_0010
Saved certificate message. 

Now that I have a certificate, I’m ready to send the account  welovenitrodesk an encrypted message:

I click on the tools/options icon and enable Encryption and signing.

IMG_0011
Tools icon to enable encryption signing.

IMG_0012
Enable signing and encryption for the email.

I send the email. If you suddenly see this message (see below), it means you didn’t validate the recipient’s public certificate key from a signed message. (This can also be done over the GAL if your company supports it.) Remember how I said earlier that to send an encrypted email, you need the recipient’s public key? Now I just need to fetch it. Thankfully, a while back welovenitrodesk sent me a signed message, which contains the key.

IMG_0016
Oops!

I find the email where welovenitrodesk sent me the key, and click on the lock icon.

IMG_0017
Welovenitrodesk sent me a signed message.

I click ‘verify signature’ and it verifies.

IMG_0018

Now I can send that encrypted message!

The second time, I attempt to send the encrypted message again. This time it comes through.

Back in welovenitrodesk, after having imported the public certificate and the welovenitrodesk certificate, I check the encrypted message, and am able to successfully decrypt it.

IMG_0020

The signed and encrypted email.

Clicking on the lock icon, I can confirm that it is indeed signed and encrypted.

Hope this helps you get a better understanding on how to use S/MIME functionality with Touchdown for  iOS. If you have any questions, please feel free to contact us at  iossupport@nitrodesk.com for any iOS queries. Be sure to check in on Monday for Part II, SMIME for Android. Thanks for reading!

KNOX Vulnerabilities

There is a lot of buzz going around the discovery that Samsung’s KNOX container has been found to have some vulnerabilities, as reported by the Wall Street Journal Tuesday and  PC World yesterday.  While it is very poor timing for Samsung, considering CES, the huge technology show in Vegas, starts next week, we are confident that Samsung is dedicated to security and will find a fix quickly.

What exactly is the concern? The vulnerabilities found by Israel’s Ben-Gurion University of the Negev indicate that Knox software (when used on a  Samsung Galaxy S4 or Note 3) could allow malicious apps to eavesdrop on data transferred within the secure environment.  The WSJ reports :“Samsung officials told the Journal that the vulnerability was found in developer phones that weren’t “fully loaded with the extra software that a corporate client would use in conjunction with Knox,” the paper reported. So far, the Knox vulnerability has only been discovered on the Galaxy S4.”

The PC World article compared KNOX to our TouchDown, since both are designed to keep data secure – so what does all this mean and how does it work?  TouchDown was specifically designed to keep data secure against this type of data breach.  It keeps corporate data secure through encryption and by keeping it ‘sandboxed’ away from a users personal data on their device (smartphone, laptop, tablet).  It works directly with ActiveSync Exchange and keeps email, contacts, calendar and notes data secure when kept within TouchDown.  Meanwhile Samsung’s KNOX creates a container around several third party apps, with the purpose of keeping data within those apps separate from app data not inside the KNOX container.  The security breach discussed  in the article regards the potential security breach of the KNOX container itself, meaning malware could have access to apps inside the container.  If there are apps inside the container that are not secure, they could potentially be breached. Luckily, TouchDown users can breathe easy, since even if a malware attack did get past the KNOX container it would not be able to breach TouchDown data. So whether you are using  TouchDown in or out of the KNOX container on a Samsung device, your data will remain secure and separate from other data on your device.  If you’re not using TouchDown…what are you waiting for??

Hot off the Press – new version of TouchDown for iOS

Yes, yes, yes, it’s a holiday present for you !  Fresh in the iOS App Store, you will find the newest iOS release of TouchDown (3.6.2) with these updates:

  • SMIME support fixes
  • Updated layout for the iPad
  • Updated supported for Themes

How to access these fun new themes?  Simply go to Setting—->General—>Themes.

Pick the one of your choice, and exit out of  the app and reopen to see the changes. Here’s a few shots:

Forest Color Palette

Forest Theme of iOS

Dawn Color Palette with calendar event pop-up

TouchDown for iOS Dawn Theme

Ocean Color Palette in Contacts

Ocean Theme TouchDown for iOS

**In order to see everything change to the new theme, you will need to CLOSE the App, then reopen, and you will see the theme applied to each element.

Have fun!

Switching to a slick new Samsung Android device?

This how to switch from one Android device to another tutorial comes from one of our Support Guru’s, Nitrodesk Nanny.  We thought you might need it soon with the new Samsung devices releasing September 25th…And yes, new TouchDown for Android release scheduled for late September!

One of the top 10 questions we receive over at support@nitrodesk.com is how to relicense TouchDown if you switch between Android devices. Let me walk you through it. It’s easy, I promise.

First, you need to download the 30 day free trial version of TouchDown, as it is the main application. You can download the application from the Google Play Store on your device or you can download from our website http://www.nitrodesk.com/purchase. Once you have it installed, configure it with your email account.

If you have Android OS 2.x on your device, you will want to download TouchDown for Smartphones.

If you have Android OS 3.x and above on your device, you will want to download TouchDown HD (for ICS/JB).

We are now ready to activate TouchDown!

You need to determine how you purchased the license originally. We now have several ways of purchasing a license key for TouchDown so this is important.

  • Google Market/Play Store/Google Checkout
  • Amazon Android App Store
  • Esellerate

With Google Market, Google Play Store, or Google Checkout you need to download our license key application. This is called Exchange by TouchDown Key or TouchDown Pro Key. You can log into https://checkout.google.com  to  see which Gmail account you purchased with.

If you purchased via Amazon Android App Store, you will need to have the Amazon application installed and you will need to be logged in with the account you purchased with. More information can be found here: Getting Started

If you purchased via Esellerate you would have received a confirmation email. Within this confirmation email is the serial number you would need to type in to activate TouchDown. If you do not have your confirmation email you can also search for your order here: https://www.mycommerce.com/order-search

Read more at https://nitrodesk.zendesk.com/entries/25134096-How-to-Relicense-TouchDown

Nitrodesk Nanny